OXD3315010K Oxford ELECTRONIC DIGITAL OUTSIDE MICROMETER 0-25mm/0-1 Inch
Sakha.co.id adalah distributor Oxford OXD3315010K ELECTRONIC DIGITAL OUTSIDE MICROMETER 0-25mm/0-1 Inch di Indonesia. Oxford sendiri merupakan perusahaan multinasional yang focus pada bisnis Precision Equipment
Deskripsi Produk
With SPC Data Output Easy handling with a large digital display, quick response speed and zero set at any point. Metric/inch measurement. The micrometer can be connected to a PC serial port by the SPC cable provided. IP54 rating. Range: 0 – 25mm/0 – 1″. Resolution: 0.001mm/0.00005″. Measuring force: 5 – 10N. Accuracy: -0.004mm.
Spesifikasi :
| Resolution | : 0.001mm |
| Weight Each | : 250g |
| Data Output | : SPC |
| System of Measurement | : Imperial |
| Metric | |
| IP Rating | : IP54 |
| Measuring Range | : 0 – 25mm |
| Additional Features | : large digital display |
| quick response speed | |
| Accuracy | : +/-0.004mm |
Baca Juga : OXD3314060K Oxford ELECTRONIC DIGITAL DEPTH GAUGE 0-150mm
In various contexts of science, technology, and manufacturing (such as machining, fabricating, and additive manufacturing), an indicator is any of various instruments used to accurately measure small distances and angles, and amplify them to make them more obvious. The name comes from the concept of indicating to the user that which their naked eye cannot discern; such as the presence, or exact quantity, of some small distance (for example, a small height difference between two flat surfaces, a slight lack of concentricity between two cylinders, or other small physical deviations).
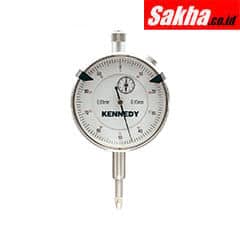
The classic mechanical version, called a dial indicator, provides a dial display similar to a clock face with clock hands; the hands point to graduations in a circular scales on the dial which represent the distance of the probe tip from a zero setting. The internal works of a mechanical dial indicator are similar to the precision clockworks of a mechanical wristwatch, employing a rack and pinion gear to read the probe position, instead of a pendulum escapement to read time. The side of the indicator probe shaft is cut with teeth to provide the rack gear. When the probe moves, the rack gear drives a pinion gear to rotate, spinning the indicator “clock” hand. Springs preload the gear mechanism to minimize the backlash error in the reading. Precise quality of the gear forms and bearing freedom determines the repeatable precision of measurement achieved. Since the mechanisms are necessarily delicate, rugged framework construction is required to perform reliably in harsh applications such as machine tool metalworking operations, similar to how wristwatches are ruggedized.
Other types of indicator include mechanical devices with cantilevered pointers and electronic devices with digital displays. Electronic versions employ an optical or capacitive grating to detect microscopic steps in the position of the probe.
Indicators may be used to check the variation in tolerance during the inspection process of a machined part, measure the deflection of a beam or ring under laboratory conditions, as well as many other situations where a small measurement needs to be registered or indicated. Dial indicators typically measure ranges from 0.25 mm to 300 mm (0.015in to 12.0in), with graduations of 0.001 mm to 0.01 mm (metric) or 0.00005in to 0.001in (imperial/customary).


Reviews
There are no reviews yet.